Want to know how to fix White Balance in Photoshop in a few clicks? White balance transforms a photo, changes the mood.
But what if you took a photo in JPEG format and Photoshop has no WB setting?
No problem. You will learn how to do it in 1 minute. All you have to do is scroll down.
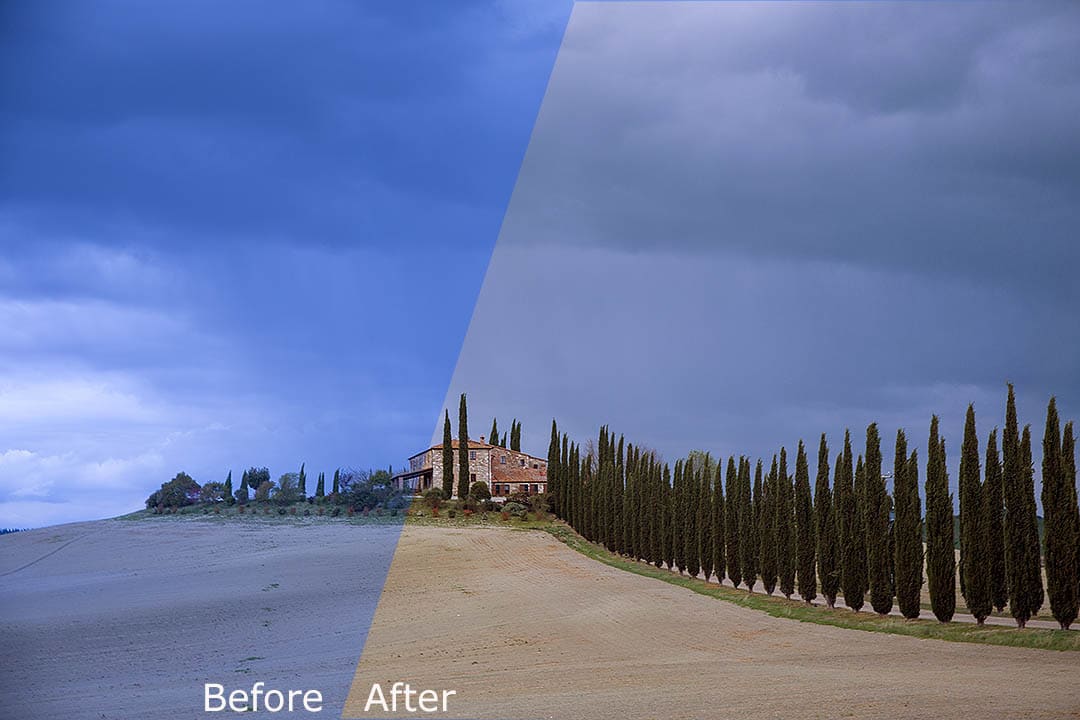
How to fix white balance in Photoshop
I write in detail about White Balance in my article, and you can read it here.
Although you are editing JPEG, you can correct White Balance in Photoshop. I was surprised by how some authors complicate this process.
In fact, it is very easy to do.
There should be 3 dots in a photo: white dot, black dot and gray dot. The best way to fix the light is to use Curves.
It is located in:
Image> Adjustments> Curves
For example. I took a landscape photo that I took in Tuscany. I set the RAW camera to fluorescent white balance. That’s a mistake. But I’m doing it on purpose.
Set the White Point
You must find the brightest spot in your picture. How do you do that?
Open the Curves dialog box. All we have to focus on is the “Eyedropper on Curves” dialog box. Click on the pipette to set the White Point.
Click and hold down the Alt button. At the same time move the white adjustment slider at the bottom of the chart to the left. Your image will turn black.
As you move the white adjustment slider to the left, parts of the image become bright. These are the brightest parts of the picture. Click on one of these parts.
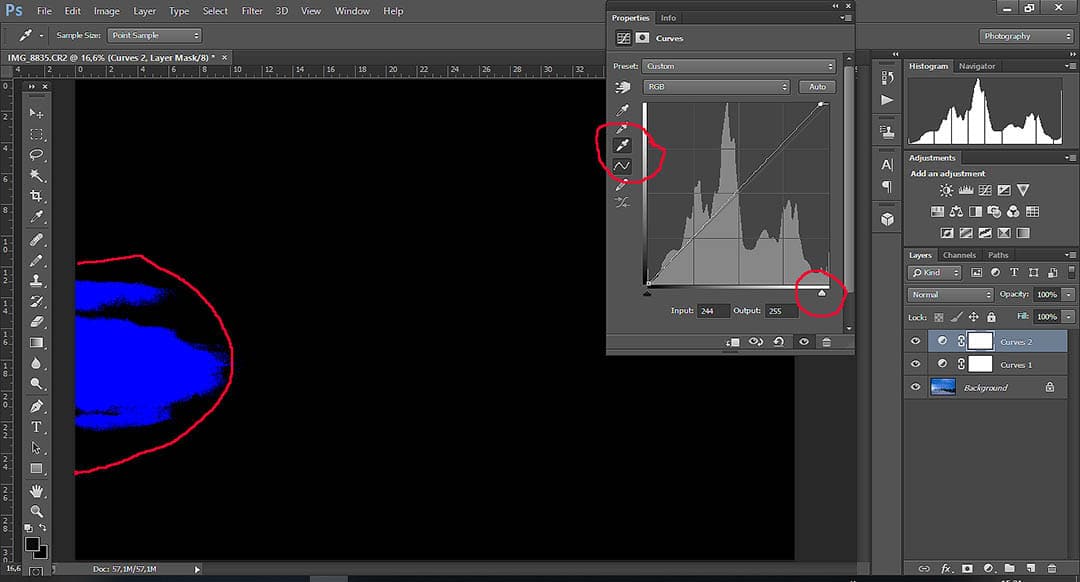
Expand the image. This makes it easier to work with the eyedropper. If you want, you can select another area of the frame. The white dot is set.
Set Black Point
Expand the image. This makes it easier to work with the eyedropper. If you want, you can select another area of the frame. The white dot is set.
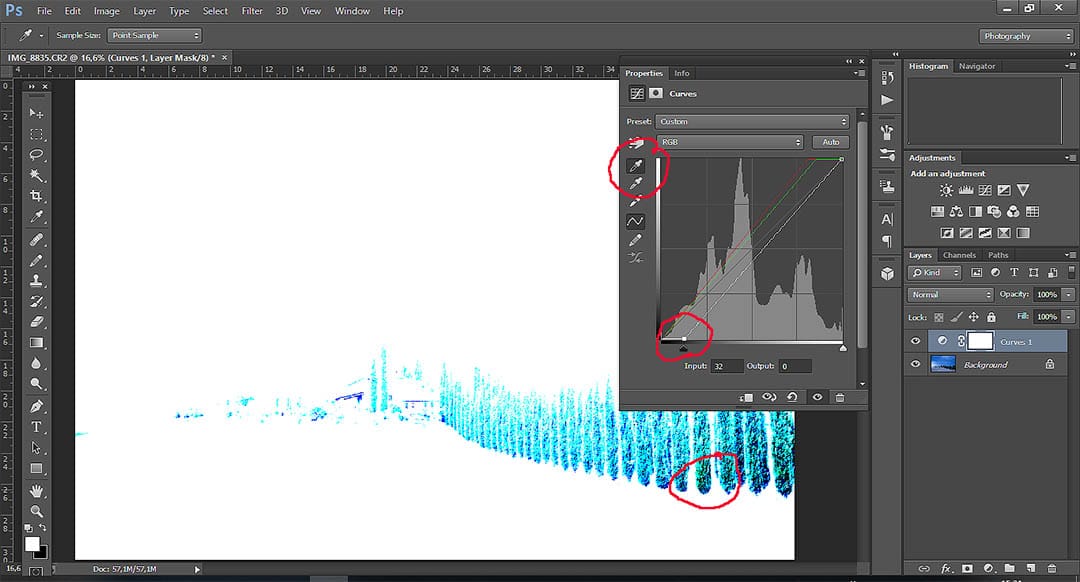
It gets better. But wait, there’s more…
Set the Gray Point
Press the grey eyedropper and select it. Then look at your photo and determine which area is medium brightness, and click. You can experiment. You don’t have to set the Grey Dot at all if the white balance suits you.
But!
If the additional correction is required for white balance, you need to set the gray point. It’s a little more complicated.
- Create new fill or correction layer and select “Fill dialog”, select fill with 50% gray point.
- Change the mixing mode to difference.
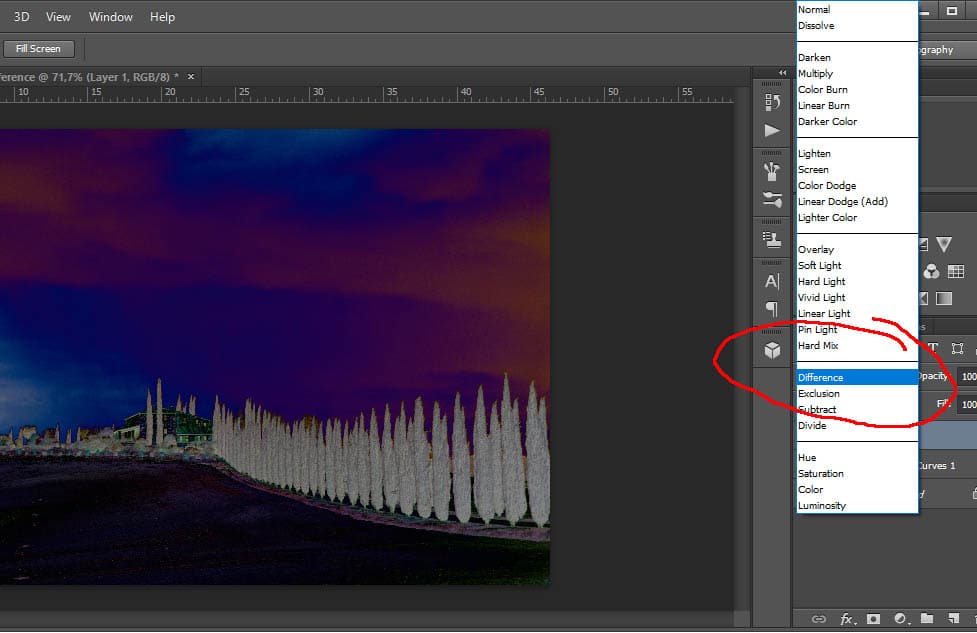
- Add a new «Threshold» adjustment layer.
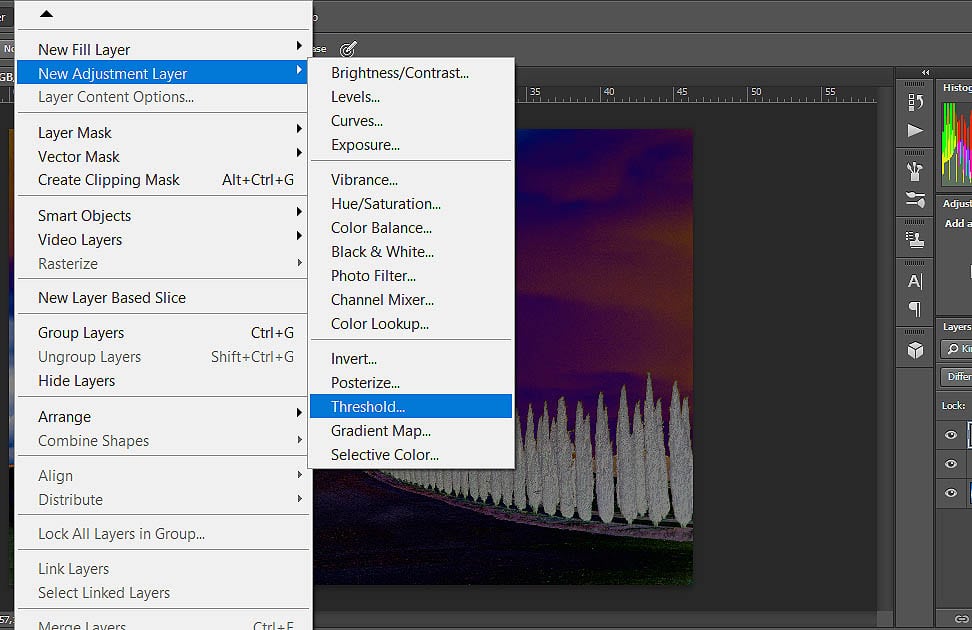
- Then slowly drag the adjustment slider to the right until gray areas begin to appear on the image.
- Select the Color Sampler Tool and click on the area you identified as gray.
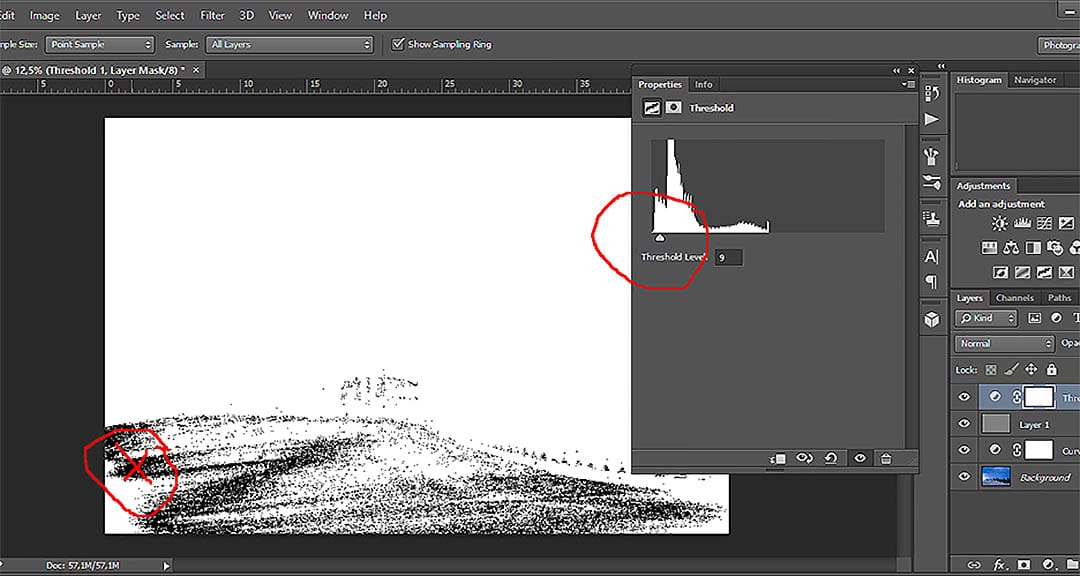
- Create a new Curve layer. Activate it and place it on top.
- Immediately remove the Threshold and Fill layers from 50% gray!
- Select the “Point Grey” pipette in the Curves dialog box and click on the marker from the step.
- The white balance is fixed.
by Nemanja Sekulic
Learn more
To improve your skills in landscape photography and learn how to take even more eye-catching images, my popular e-book, “Landscape Photography. The Complete Beginner’s Guide” will teach you the skills you need.
Regardless of your level, this ebook is written to start expanding your knowledge. “Landscape Photography. The Complete Beginner’s Guide” will teach you everything you need to start making beautiful images and take your photography to the next level.


Leave a Reply