ISO in Photography is one of the three tools that can significantly affect the appearance of your images – the ISO camera. At first, it seems complicated and you can give up studying. But trust me, everything will be fine soon. This article is the first in the “Exposure” series. Let’s start studying the ISO.
Landscape Photography a Comprehensive guide for beginners PDF e-book
Landscape Photography a Comprehensive guide for beginners is an e-book that will allow you to learn the basics of photography and teach you to take beautiful pictures of different types of landscape in all weather conditions.
What does iso mean in photography
ISO in photography is one of the main settings of a digital camera and can impair the quality of pictures if used incorrectly. In previous years, ISO meant the sensitivity of film to light. Today it is not. ISO does not change the sensitivity of the camera sensor and always keeps the same sensitivity. The higher the ISO, the brighter your picture is, and the lower the ISO, the darker your picture is.

by Apalapse
What should we know about ISO in a practical sense
This basically means that with a low ISO you will use slower shutter speed, and with a high ISO, you will need a faster shutter speed. When you double the ISO speed, you double the brightness of the photo. So, an ISO 800 photo will be twice as bright as ISO 400, which will be two times brighter than ISO 200.
Each digital camera has about the same range of ISO settings that you can use. Between 100 ISO and 6400 ISO and high.
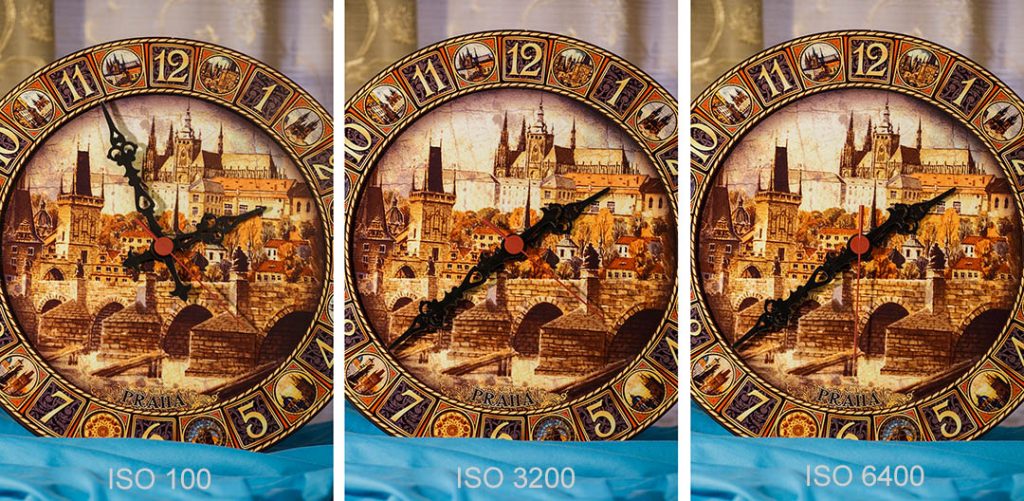
High ISO has negative effects. A photo taken at an ISO level that is too high will show a lot of grain and noise. And the image may be broken, unsuitable for use.

You should raise the ISO only when you cannot change the shutter speed or aperture. For example, if you shoot without a tripod in low light. Shutter speed will long and blurring your subject.
I always use a tripod, and I would like my ISO to be as low as possible, preferably at ISO of 100.
What is Base ISO
The lowest ISO setting for your camera is the base ISO. In my digital camera, the lowest is ISO of 100. Some cameras have basic ISO of 200. Base ISO works great for 90% of images. You should use the minimum ISO if possible.
PRO tip: You’ll get used to leaving your ISO based on ISO 100.
There are three specific situations where ISO should be increased beyond the base:
- Reduce the shutter speed if you cannot change the aperture.
- Increase the brightness of the image, if you cannot change the aperture and shutter speed. For example, shooting Polar Lights. Maintaining a low shutter speed and wide aperture, most of the light enters my lens without producing star trails.
- Increase the depth of field if you want to close the aperture, but don’t change the shutter speed.
Low ISO or High ISO?
Low ISO or High ISO, the answer to this question is obvious. Always try to use low ISO if possible. For example, if your camera is mounted on a tripod, you can use a low ISO.
When it gets dark outside and you don’t have a tripod, you will need to increase the ISO. Tripod, long shutter speed and low ISO give you amazing images.

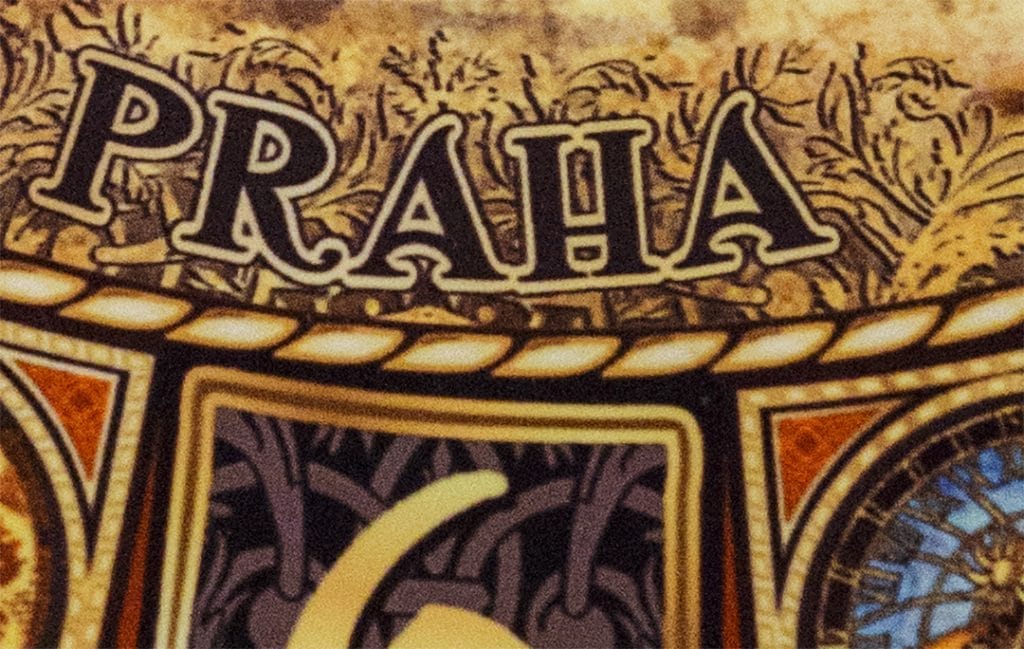
Let’s zoom in and look at this photo.

Auto ISO
Most cameras have Auto ISO settings. This tool works great in low light. The convenience of this setting is that you enter the maximum ISO and the camera does not exceed this limit. If you want to limit the amount of noise in a photo, you will set maximum ISO to something like ISO 800 or ISO 1600.
I don’t prefer Auto ISO as I need full control of the exposure.
When to use high ISO?
My only reason to use high ISO in landscape photography is the Polar Lights shooting.
I use ND filters, polarizer, shutter speed, aperture, something else, but keep the base ISO, as a last resort close to them. Low ISO saves my photo from grain and noise and this is the main for landscape photography.
Sometimes, isn’t possible to keep a low ISO, especially if you are a beginner and don’t have the necessary equipment for landscape photography.
Summary
– High ISO gives a lot of grain and noise
– Low ISO gives a long shutter speed
– Always seek to use the base ISO of your camera
– Always set ISO last time after shutter speed and aperture
– Get a tripod, so as not to be hostage to the situation
I am sure you have no more questions about ISO. But if you want to clarify or add something, I will be glad to read your comments on this article.
MORE EXPOSURE RESOURCES
Please check out some of our previously published free tutorials in my archives.
- Exposure
- Aperture in Landscape Photography
- Exposure Triangle in Photography
- The Depth of Field
- The Histogram in Photography
- White Balance is part of the Exposition
- Exposure Triangle cheat sheet
- Shutter speed chart
- F-Stop Chart
- 3 Easy Steps to Fix White Balance in Photoshop
Anyone has any tips to add? Please share in the comments!

Leave a Reply