About this Guide
This guide provides detailed guidance on surveying northern lights in the Lofoten Islands.
- In the first part you will find out where and when you can see the Northern Lights.
- In the second part of this guide you will learn how to shoot the Aurora and what equipment you need.
- In part three, I recommend the best hotels to stay in and share some planning tips.
- In the fourth part of the guide you will find the Northern Lights Photo Workshop.
Table of content
- Introduction to the Northern Lights
- When to see northern lights in Lofoten
- Where to see the Northern Lights in Lofoten?
- What to do to see the Aurora Borealis?
- PHOTO GEAR AND EQUIPMENT
- HOW TO PHOTOGRAPH THE NORTHERN LIGHTS?
- HOW TO SET THE CAMERA TO CAPTURE THE NORTHERN LIGHTS?
- HOW TO FOCUS THE LENS AT NIGHT?
- CALCULATE THE EXPOSURE
- WHAT SHUTTER SPEED DO YOU NEED?
- WHERE TO STAY ON LOFOTEN ISLANDS
- PROCESSING NORTHERN LIGHTS PHOTOS
Quick Planing Lofoten Islands Travel Guide
- Find the best flights to Lofoten
- Travel insurance. This is very important especially if your activity involves hiking, biking, kayaking, and hiking in the mountains. I recommend the insurance company Word Nomads
- To rent a car get great deals on Rentalcars
- Lofoten Accommodation: Elisassen Rorbuer in Hamnøy, Reinefjorden Sjøhus in Reine, Anker Brygge located on an island just off Svolvær Harbor, Scandic Leknes Lofoten the best in Leknes, Nusfjord Arctic Resort in Nusfjord
- If you'd like Activities:
- Read Lofoten Islands Travel Guide
- Look into my camera bag
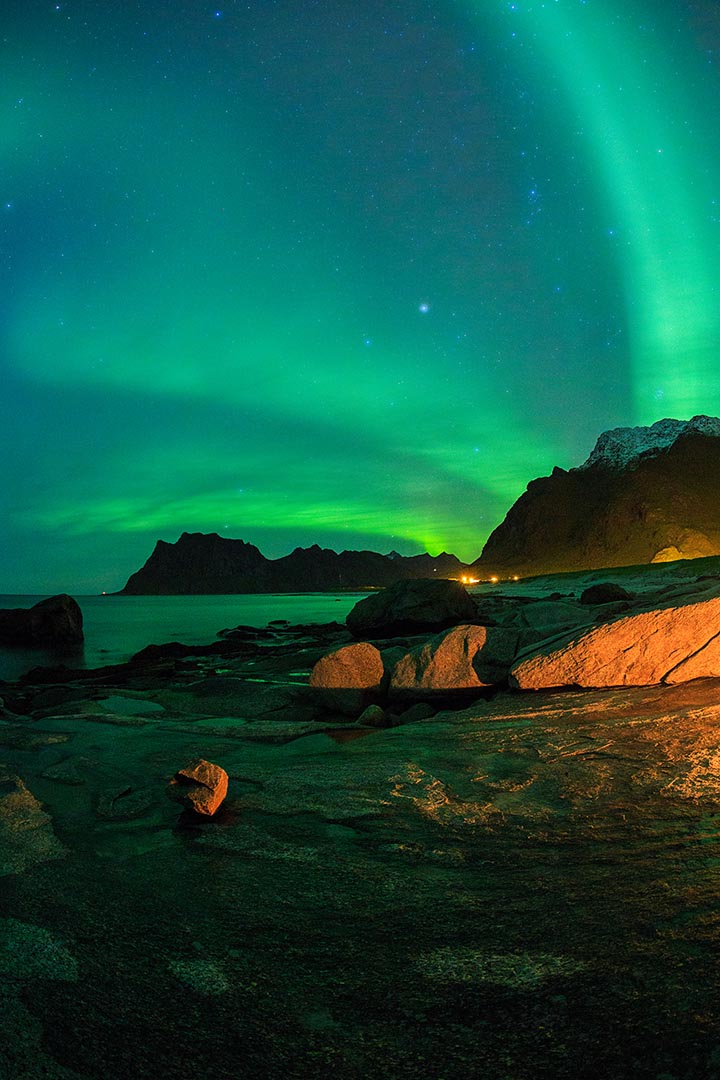
PART I. Introduction to the Northern Lights in Lofoten Islands
The Northern Lights of the Lofoten Islands are one of the most unforgettable natural phenomena.
The Lofoten Islands are beautiful at any time of year and in any weather. But you can’t see the Northern Lights all week because of the changeable weather. Pre-tune yourself so that the Aurora is a bonus to your visit here.
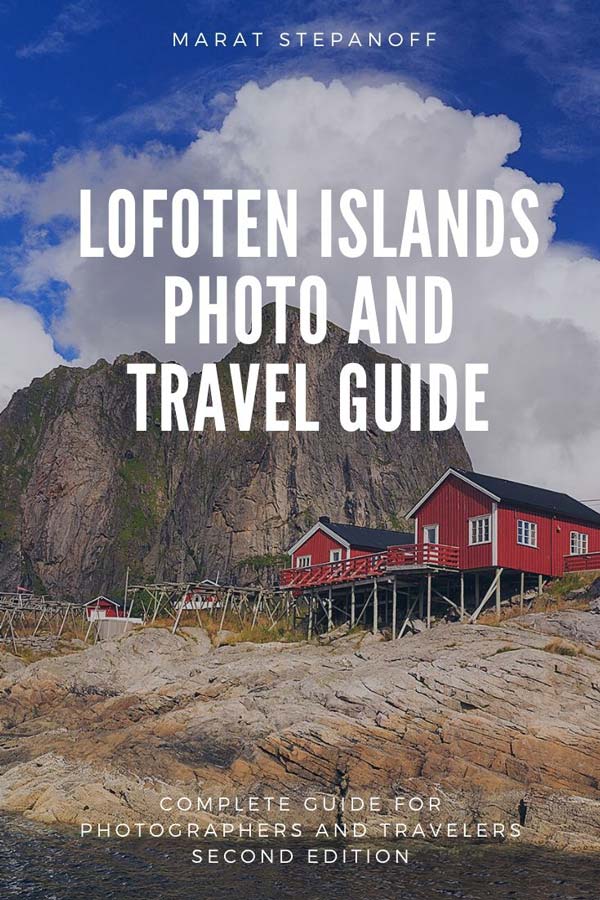
Lofoten Islands. Photo and Travel Guide. Second Edition 2020. PDF e-book
Lofoten is an inexhaustible source of inspiration for artists and photographers around the world. I wrote this guide to share my Lofoten travel experience with you. I’d be glad if this book helps and inspires you to create new amazing photos.
Have you seen what many guides write in the disclaimer? They guarantee you everything you want except that you will see the Northern Lights. Therefore, if you decide to come to the Lofoten Islands just to admire this natural phenomenon, then you can be really disappointed.
This guide will help you plan your trip and I will give you some practical tips on how to shoot “The Northern Lights”.
Here you can see the dramatic scenery of celestial peaks, sandy beaches, rocks, wide-open spaces with beautiful backgrounds.
There are also many interesting places to shoot and almost all viewpoints are near the road. You do not need to walk far, just a few dozen meters from your car.
There are places in the Reine and Hamnøy from which you can shoot directly from the doors of your hotel room. This is amazing.
You can drive and stop to shoot anywhere. But always think about your safety. Always wear a reflective vest in the dark on Lofoten.
The Northern Lights in the Lofoten Islands are a light show that will change you forever.
I froze when I first saw the green glow of the sky. I didn’t know what to do? To watch, to start shooting… I was in shock.
When I saw that light begin to move through the sky, changing shape, disappearing and flashing again, I felt like a part of the universe at that moment. I didn’t want to take any more pictures.
I just stayed and looked fascinated in the sky. There were nothing and nobody around me. I still can’t stop admiring the northern lights.
When to see northern lights in Lofoten Islands
Read my advice on when to see the northern lights and what time of year it is best to go to the Aurora.
The strongest activity (KP Index) of the Northern Lights is in October and early March. You can see the Northern Lights in the Lofoten Islands from 8 am to 9 pm.
August to October. The Northern Lights can be seen from the end of August. But its intensity is not strong and the night is still very short. In October, everything changes. October is one of the best months to see the Aurora.
November is December. Not a good time to visit the Lofoten Islands. The weather is terrible, with long rains and storms.
January to March. From early February to mid-March is the best time to visit the Lofoten Islands and take pictures of the Northern Lights. The day gets longer. There are more sunny days and less precipitation.
End of March – April. By the end of March, there is less and less opportunity to observe the Northern Lights. This is due to the fact that the days are getting longer. I’m not sure you can see it in April.
by Ryoya Takashima
Best time to see the Aurora in Lofoten
The best time to see the Northern Lights on the Lofoten Islands is in October, February and the first half of March.
The intensity of the Northern Lights is not the same throughout the year. Plan your visit for October or from February to the first half of March.
Read More: How to Protect your Camera from Rain
As the name implies, Northern Lights can be seen not only in the Lofoten Islands but everywhere in the North, i.e. in Finland, Iceland, Alaska, Canada, the Faroe Islands, Sweden and other places in the north. The Northern Lights can be seen further to the south. I saw it once in Southern Finland. But its intensity will be weak.
Contrary to misconceptions, the Northern Lights are a year-round phenomenon. But it can only be seen from late autumn to early spring. It’s light all day in summer in the north. And you can’t see it.
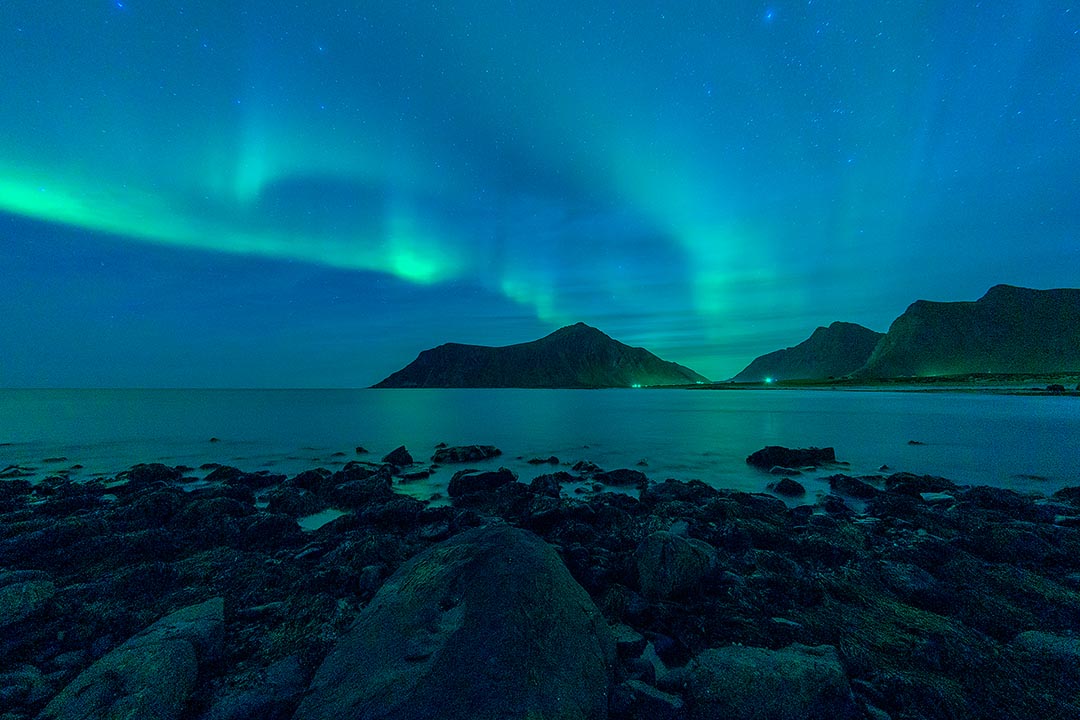
Where to see the Northern Lights in Lofoten?
The best places to see the Northern Lights are the beaches on the Northwest coast. It’s beaches of Flakstadøy and Vestvågøy:
- Uttakleiv beach
- Haukland beach
- Vik beach
- Unstad beach
- Skagsanden beach
- Storsandnes beach
- Myrland beach
I wrote about some of these beaches in my article 5 the best beaches of the Lofoten Islands.
A lot of scenery can be found near Reine and Hamnøy.
The beaches of the Lofoten Islands are one of the best places to shoot the Northern Lights in Norway and around the world. With breathtaking scenery around you, they offer the perfect background for Northern Lights photography.
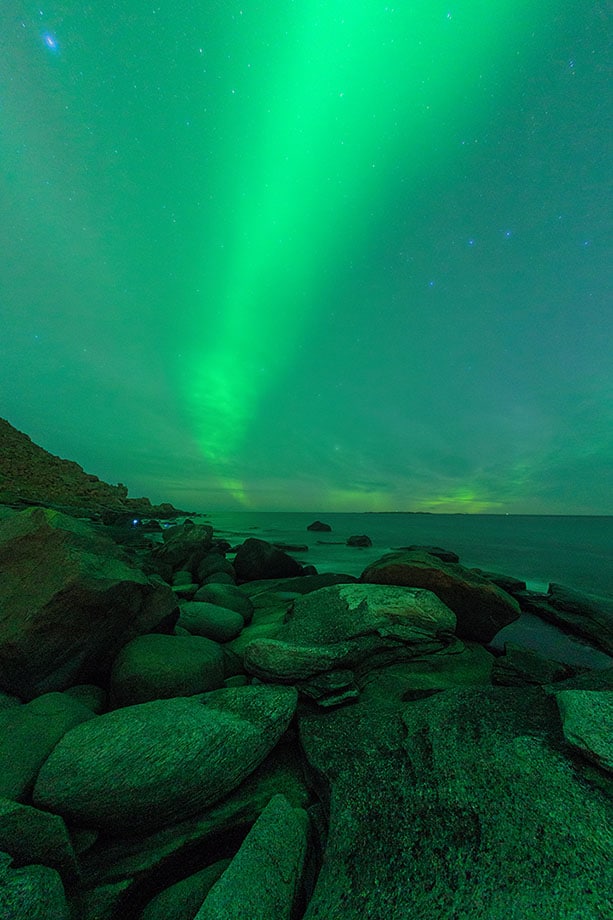
Uttakleiv Beach is the best place to take pictures of the Northern Lights, with its beautiful foreground and memorable mountain range against the sky. A little light pollution on the right side of the beach will not spoil your photo.
Haukland Beach is a great place to take pictures of the sunset in winter and at the same time a good start for taking pictures of the Northern Lights. The mountains on the right block the sky, but this is not always a problem. After this beach, you can continue on Uttakleiv beach or Vic beach.
Vik Beach is not the most spectacular beach compared to Uttakleiv and Haukland beaches. But it is well located and has beautiful mountain views. If you have the strength to shoot and you are watching the Northern Lights at the same time, you can continue shooting at this beach.
Unstad beach is very beautiful at sunset, but it is difficult to shoot the Northern Lights at night. This beach is not facing north and there is nothing in the background. You have to look for a good point to shoot. The beach is full of big and round boulders. This is the original foreground for the shooting. I’d visit it one last time after you shot all the other beaches on that list.
Skagsanden beach is one of the most popular beaches among surfers and has recently become an attraction for photographers. This small sandy beach with mountains in the background is oriented towards the north and is a good place to shoot northern lights.
Storsandnes beach and Myrland beach are very cozy places, located away from the main roads. The large open water areas do not cover the Aurora. Guess your visit so the rocks on the beach are washed in waves.
Reine is the most famous city in the south of the Lofoten Islands. If you come to the Lofoten Islands, you will definitely visit the Reine. It’s very difficult to shoot Northern Lights on the Reine. There’s backlighting. You must use exposure bracketing.
Hamnøy is a fishing village near the Reine. The world-famous view from the bridge is a great place to take pictures of the Northern Lights in the Lofoten Islands.
30 Tips for Photographing Amazing Arctic Landscape
This is FREE e-Book about my practical experience as a landscape photographer for traveling North.
These are 30 simple tips on how to catch a good shot in all weather conditions in places like Northern Norway, Iceland, the Faroe Islands, and any other location.
What to do to see the Aurora Borealis?
- Find the dark sky. That’s the most important thing. You should look away from any big city. If the KP index (North Lights Intensity Index) is high, you can watch it near small towns. But it’s best if there’s no light pollution around.
- Use the Dark Sky website. You can find a map of light pollution on this site. You should go into the dark. If the moon is full, you may not be able to see the northern lights. The parasitic lighting of the moon will not allow you to take a good picture.
- Use special software. The intensity of the northern lights is not the same. Every day it is different. There are days when the northern lights can be seen at all. The intensity of the northern lights is not the same. Every day it’s different. There are days when the northern lights can be seen at all.
- Check the weather forecast. If there’s thick cloud cover, you can’t see the northern lights. Variable cloudiness can create good conditions and you will take a creative photo.
WHERE TO STAY ON LOFOTEN ISLANDS
There’s nothing like seeing the Northern Lights from a traditional fishing hut.
One of the most popular fishing cabins in the archipelago, the Eliassen Rorbuer. Eliassen Rorbuer is located in Hamnøy and it’s a really amazing hotel on Lofoten Islands. You can watch Aurora from the window.
Reinefjorden Sjøhus is second the best pick for staying in Reine.
Close to Svolvær airport, there is the Anker Brygge Hotel.
If you get to the Lofoten Islands for many days and are planning a trip around the area, I suggest you stay in Leknes. Leknes is located in the center of the archipelago. Scandic Leknes Lofoten is the best hotel in Leknes.
If you need something cheaper Lofoten Rorbuopplevelser or Lofoten Home Apartment is a good choice.
Maybe you got to the edge. The coastal village of Å in the Lofoten Archipelago. Stay in one of “rorbu” Å Rorbuer.
Undeservedly forget one very cozy fishing village called Nusford. The Northern Lights are surrounded by cliffs and one of the most popular fishing villages in Lofoten. Nusfjord Arctic Resort.
Booking.comPHOTO GEAR AND EQUIPMENT
This is a very important aspect.
What kind of photographic gear is needed for shooting the Northern Lights? Let’s see what you will need.
Photo Gear
My favorite. I am constantly optimizing the contents of my camera bag. Check out what I’m currently recommending.
Equipment
- Warm clothes according to the system of layers
- Waterproof pants
- A cap
- Gloves
- Boots
- Rubber High Performance Boots.
- Warm socks
Accessories
– Headlight
The flashlight will be useful for you when setting up the camera and focusing.
– Smartphone
Install in advance all the applications specified in this guide.
– Thermos and snacks
Hot tea, coffee, and snacks, this is a great solution to get warm and have a snack.
Software and forecast web services for shooting Aurora Borealis
There is special software. I have already mentioned some of it in the guide, and I will talk about something else further. In this section, I showed you a list of everything you need.
yr.no – Weather forecast
Norway lights forecast – Northern Lights forecast
Aurora Forecast – for IOS and Android
PhotoPills – all about the light
PART II. HOW TO PHOTOGRAPH THE NORTHERN LIGHTS?
Scouting the place is desirable. You must shoot at night. It won’t be fun if you break your neck in the dark.
Of course, if you are a participant in the photo tour, you rely on your guide and his knowledge of the area. Moreover, a professional guide will always show you the place to shoot during the daytime.
Why would you do that?
In the afternoon you can find an interesting landscape in advance and plan your future photo. Don’t be lazy to do it.
Plan your way from the car to the shooting point, find dangerous places. Try to remember everything. At night, you must be free to navigate.
PRO tip: Never leave your camera bag on the ground while shooting. If you lose it, you probably spend the rest of the night looking for it.
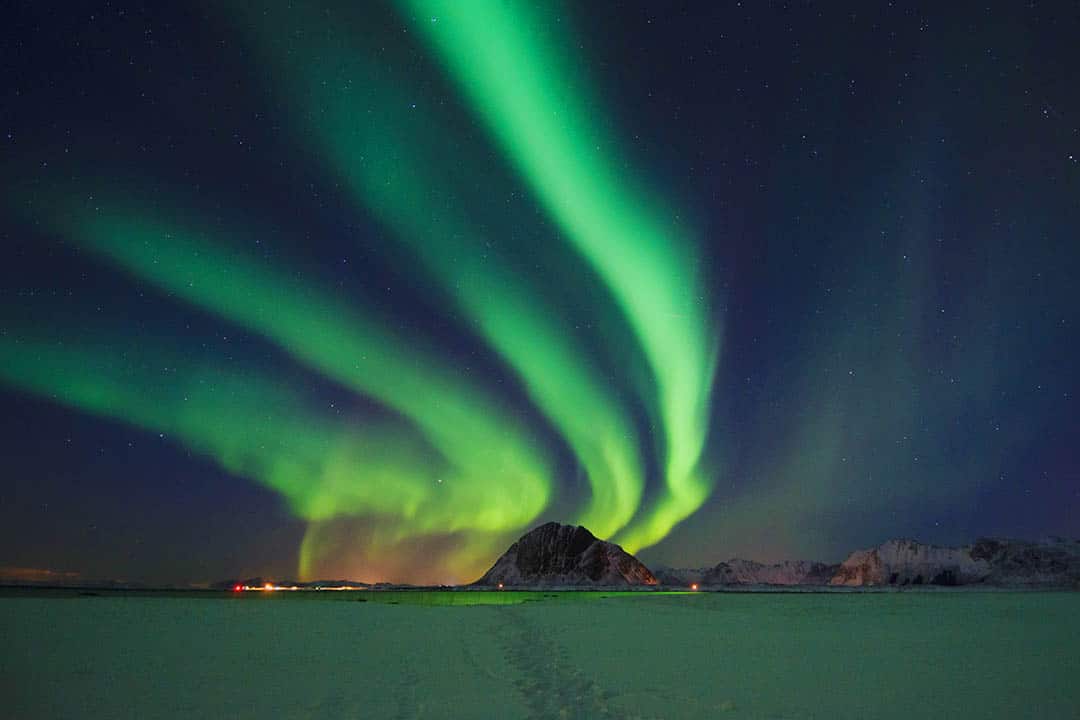
HOW TO SET THE CAMERA TO CAPTURE THE NORTHERN LIGHTS?
Did you shoot in M mode during the day? It’s hard for a beginner. Taking pictures of northern lights in M mode is very difficult. But you have to learn it.
Any other camera mode is not suitable for Aurora Borealis. Because the brightness of the sky changes all the time, you often have to change the basic camera settings.
Do it in the dark and quickly. Measuring modern cameras does not work properly for the Northern Lights. For this reason, you will have to choose M mode.
Basic camera settings:
- AF-mode.
- RAW.
- Evaluative Metering или Matrix Metering for Nikon.
- Apertures 2.8-4 / f.
- The shutter speed is 5-15 seconds.
- Start out shooting with an ISO of 800.
ISO and shutter speed, we will adjust during shooting.
You set up your camera. It’s time to go photograph.
Read More NIGHT PHOTOGRAPHY SETTINGS
HOW TO FOCUS THE LENS AT NIGHT?
The first thing you have to do is not make a fuss. Either you have time to shoot the northern lights or not. Let your eyes get used to the darkness and walk slowly to a pre-planned shooting point.
The main difficulty in taking pictures of night scenes is focusing. The camera’s autofocus works fine, not always like this. You have to be prepared for this. Unfortunately, modern lenses are not designed for manual focusing. That’s a problem. And it has to be solved.
There are four tips.
- Using your camera’s Live-View. It’s a lottery because you can’t see much on the screen. You’ll most likely take unfocused pictures. In the dark, the autofocus doesn’t quite work.
- Focus the lens on north light flashes. It’s a good choice, but if you don’t have a landscape in the foreground.
- Remove the flashlight and highlight the foreground 2-3 meters in front of the lens.
- Focus the lens on a bright spot in autofocus mode and gently turn off autofocus on the lens. Then do not touch the lens and take the picture. The wide-angle lens has an enormous depth of field. The frame should be sharp even at an aperture of f/2.8-4.
Do not shine a flashlight for a long time. It is desirable not to use it at all, if possible. You will interfere with other photographers. You must respect your colleagues.
In the group, the lighting time should be agreed with all participants. And before you shoot, give a loud warning: I’m shooting!
Read More HOW TO FOCUS IN NIGHT PHOTOGRAPHY
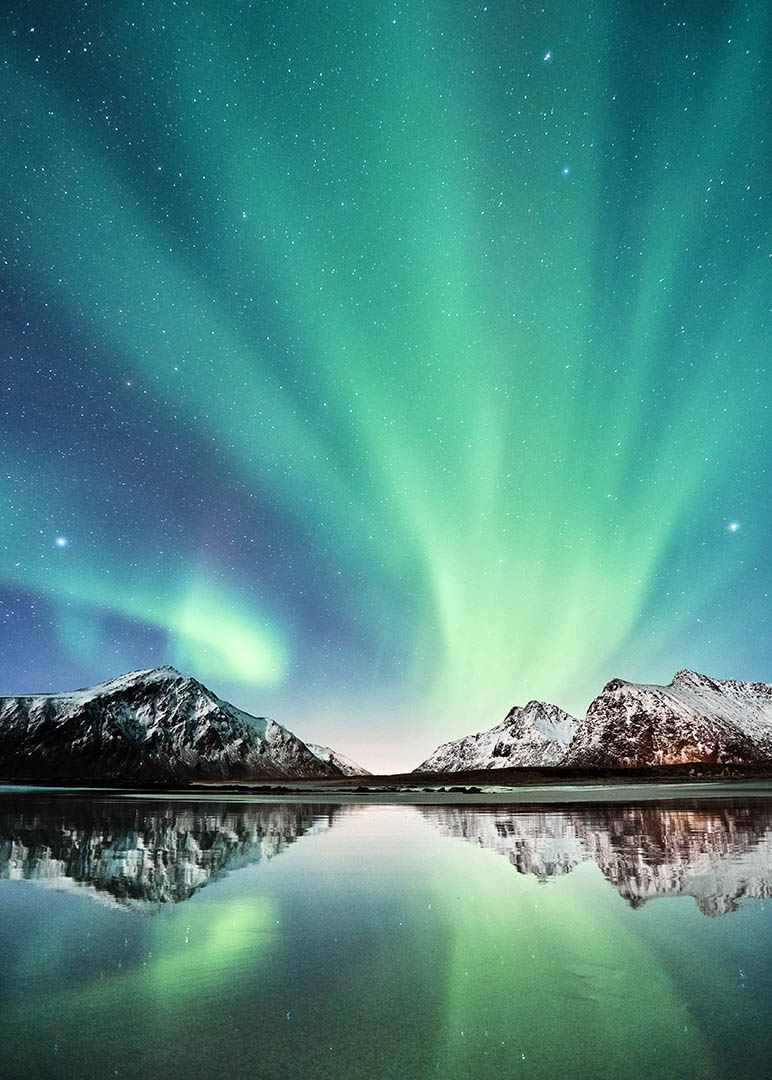
It is very important to remember the sequence of actions and perform them.
Do you already know what a Histogram is? It is the main tool you will use to analyze the shutter speed.
Do not pay attention to the current shutter speed. For example, in the basic setting, it will be 20 seconds.
CALCULATE THE EXPOSURE?
I’ll remind you once again of the basic settings
- AF-mode
- Aperture f/2.8-4
- ISO-800
- RAW
- Evaluative Metering or Matrix Metering for Nikon (optional)
By mounting the camera on a tripod, selecting the frame and focusing the lens, you start shooting.
The first frame will be experimental. It is important for you to understand the intensity of the northern lights.
If the picture is dark, set ISO-1600 or ISO-3200. You can set a high ISO, but be aware of the digital noise.
If the photo (overexposure) is light, you set the ISO to less (400 – 200). A lower ISO setting causes less noise in the image.
If the image is still bright at ISO 200-400, you should adjust the shutter speed. For example, 20 – 15 – 10sec.
I once shot Aurora Borealis at ISO-400, f/4, 3 sec.
Did you not ask yourself why you can’t increase the shutter speed?
It would seem so simple. Increase the shutter speed to 30… 60… 90… 120… ” sec… Don’t do it.
Star trails are a problem. The stars in the photo will move at long shutter speeds.
Lofoten Islands. Photo and Travel Guide. Second Edition 2020. PDF e-book
Lofoten is an inexhaustible source of inspiration for artists and photographers around the world. I wrote this manual to share my Lofoten travel experience with you. I’d be very glad if this book helps and inspires you to create new amazing photos.
WHAT SHUTTER SPEED DO YOU NEED?
The basic rule is that the shutter speed is inversely proportional to the focal length of the lens. Use this table and do not think about it.
| Focal length | Maximum shutter speed to avoid Star Trails |
| 15mm | 40 sec |
| 24mm | 25 sec |
| 35mm | 17 sec |
| 50mm | 12 sec |
| 85mm | 7 sec |
| 135mm | 4 sec |
| 200mm | 3 sec |
| 300mm | 2 sec |
PROCESSING NORTHERN LIGHTS PHOTOS
I’ll show you how to edit the Northern Lights photos. These are the basic settings. But most of them will be enough for a novice photographer. In any case, you should experiment.
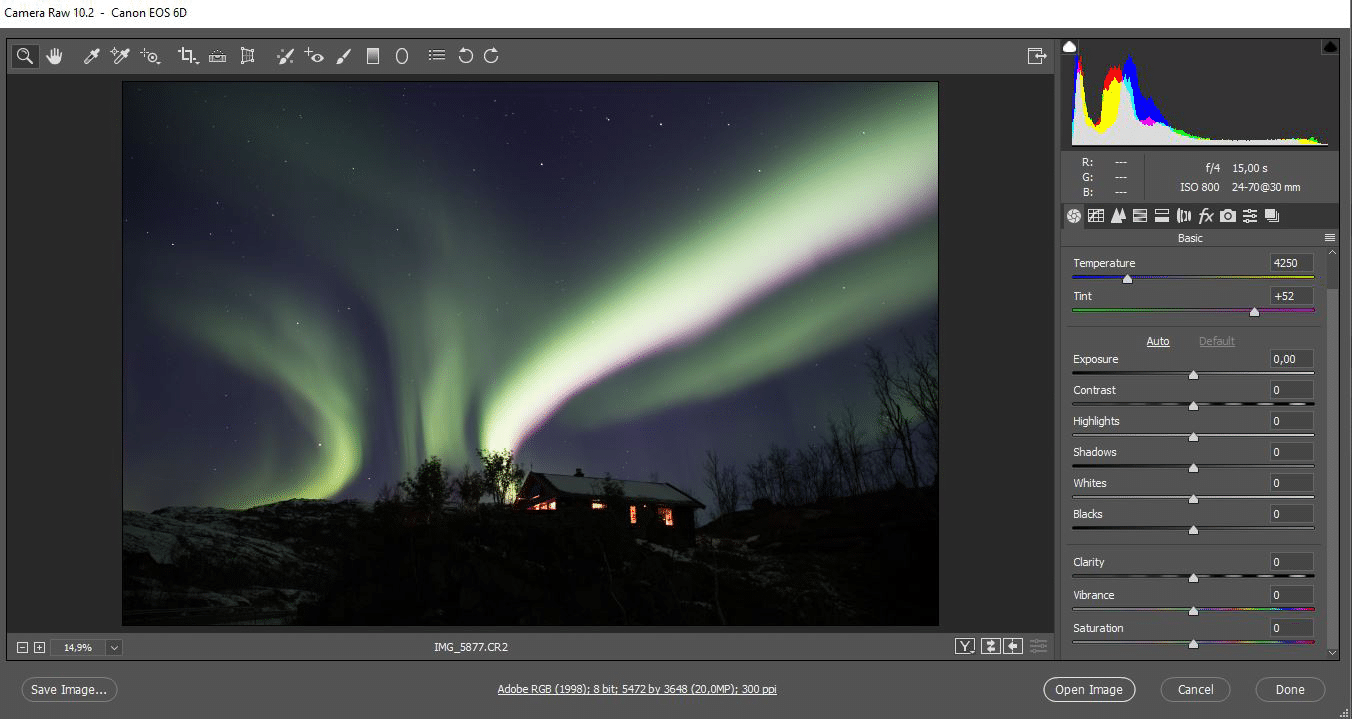
Basic settings for RAW
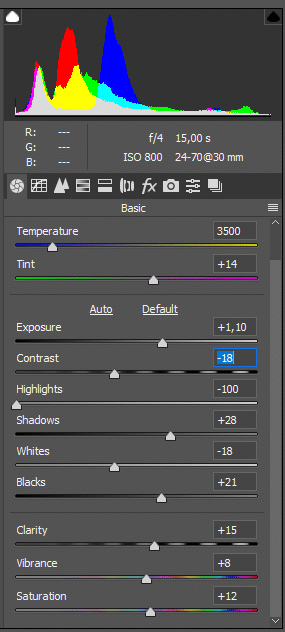
- Lens correction. This is the first thing you should do when processing any photo. You can also correct the horizon. These settings are automatic.
- White balance. AWB’s Northern Lights are not perfect for pictures. Most photographers agree that the white balance for North Lights is 2800-4500K.
- Exposure. Most of the time, your photo will be blank. I corrected the exposure in two steps. Immediately and after adjusting the basic settings.
- Contrast. The picture should be as natural as possible. Increasing contrast will make color noise higher. In this example, I reduced the contrast.
- Highlights. Move the slider to the left to restore some details in the highlights. I capture glare when I edit Northern Lights photos.
- Shadows. I will raise my shadows to lighten the foreground and I need to restore the details.
- Whites. A slight shift to the left makes me more dramatic.
- Blacks. Usually for the Northern Lights, I remove the black in the shadow, making it gray.
- Clarity. There are branches in my picture. I wanted to make it clearer.
- Vibrance. I wanted brighter colors and a stronger vibrance.
- Saturation. Northern Lights is a bright natural phenomenon. Some saturated colors will make the picture better.
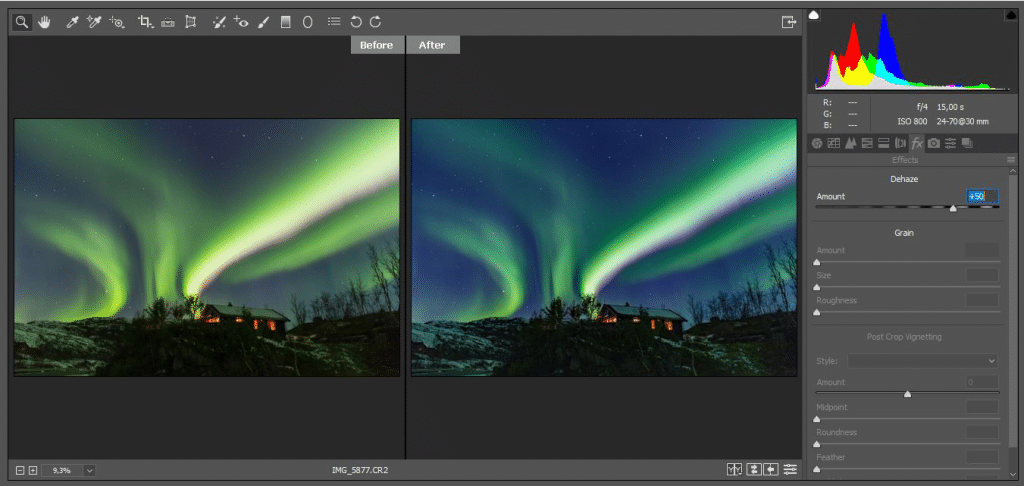
- Dehaze. It’s a very good tool that many people forget. In my example, I used dehaze (+50) to create a deep blue of the night sky.
- HSL. I’ll be editing individual colors. As I am editing Northern Lights and night sky, I will use green and blue. Some correction was enough.
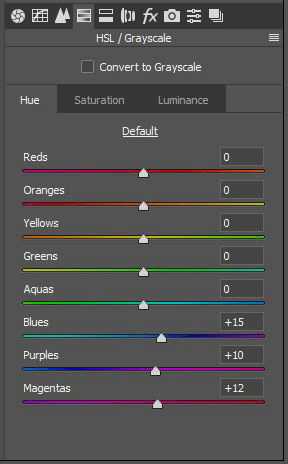
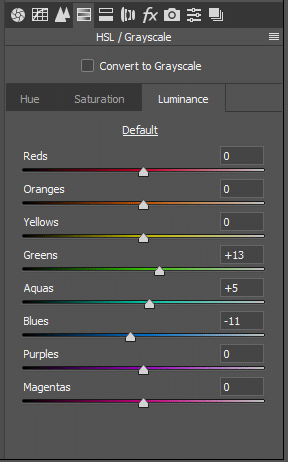
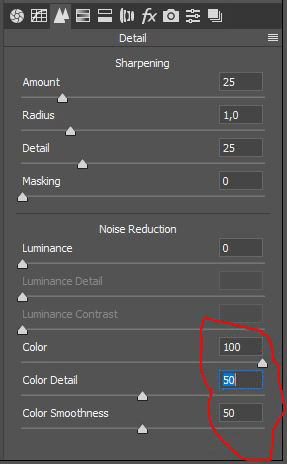
Noise Reduction. Colour noise is a problem with nighttime photos and especially northern lights. I reduced the color noise and was satisfied with the result.
Processing result
The photo was dark and expressive before post-processing.
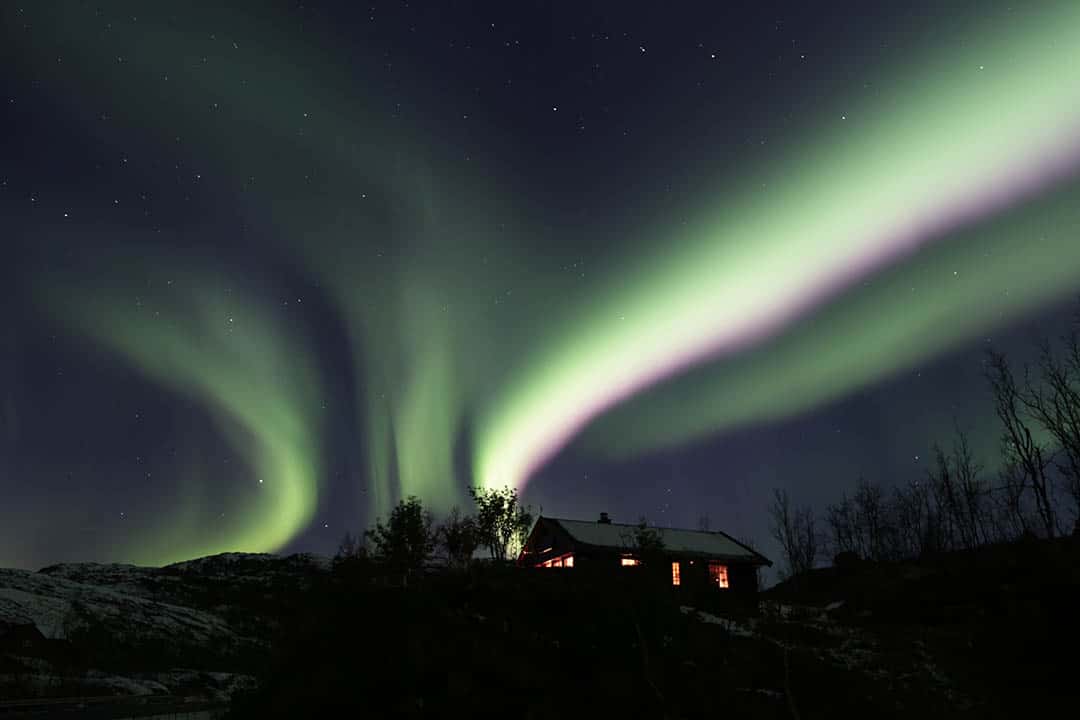
After processing, you can see the foreground in the photo, the northern lights have a more intense color and contrast, and the night sky is dark blue.
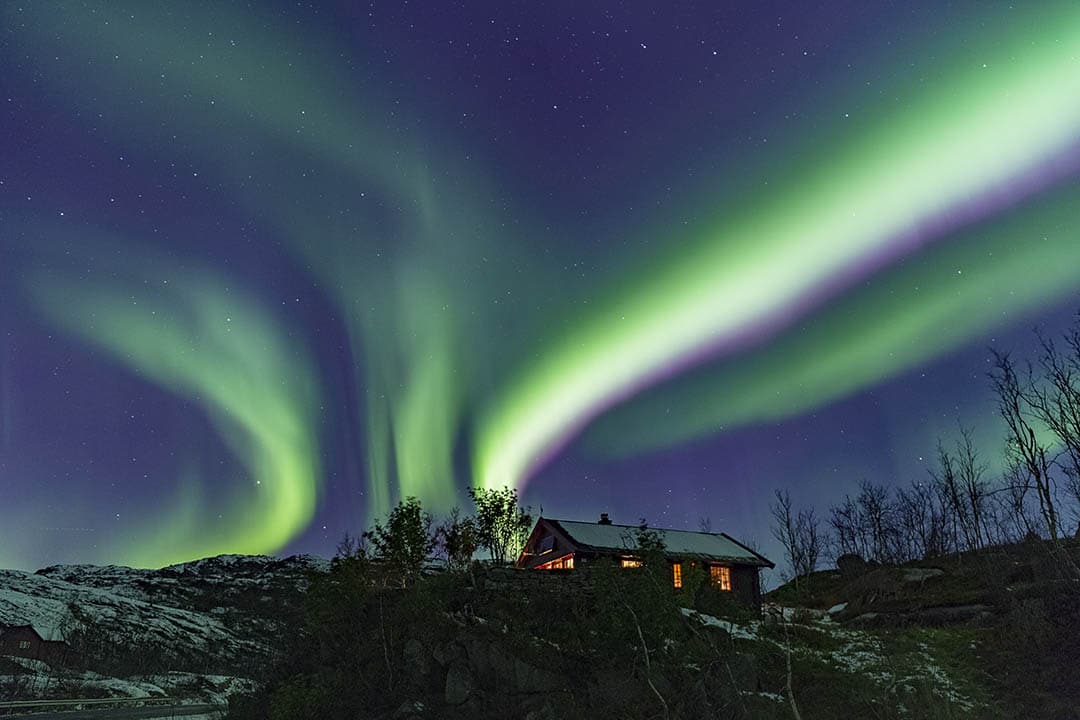
I finished processing the Northern Lights photo in the RAW camera. As you can see, I only used the RAW converter of the camera and got good results. I think you shouldn’t complicate the process if you don’t need it.
There is an interactive Google map of the Lofoten Islands. This will help you plan your trip. Save this Google map on your smartphone or tablet and use it during the trip.
Leave a Reply